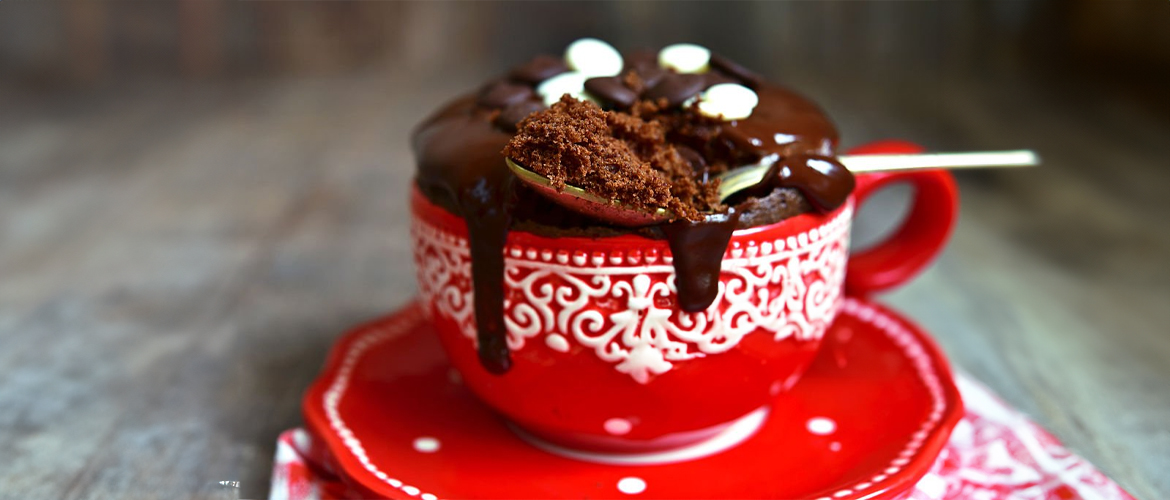
There’s nothing like craving something sweet late at night or after a long day. As someone who has made a molten chocolate mug cake more times than I can count, I can confidently say that this recipe is not just quick and easy—it’s absolutely foolproof. After experimenting with different ingredients, microwaving times, and even mug sizes, I’ve nailed the perfect method.
But let me tell you something: before I started making these at home, I used to grab one from the local bakery or coffee shop when the chocolate cravings hit. Every time, I’d spend anywhere from $6 to $8 for a single molten chocolate cake or chocolate ganache cake. And while it was delicious, I couldn’t help but think about how that adds up if you indulge regularly (which, if you’re like me, is often!).
That’s when I started experimenting in my kitchen. After a bit of trial and error, I realized that with just a handful of pantry staples, I could make dozens of these mug cakes for the price of just one store-bought dessert. The ingredients are so essential—you probably already have them in your pantry. A bag of flour, cocoa powder, and sugar?
In fact, for the same $6 to $8 you’d pay for one cake in a store, you could bake this rich, gooey, chocolatey mug cake at home over 20 times! Not only is it satisfying to make it yourself, but the savings add up quickly if you’re a regular chocolate lover like me. Plus, the taste? Every time I dig into one, I know it’s worth far more than what I paid for the ingredients.
Why It’s the Perfect Quick Dessert
Microwave desserts can be hit or miss, but the molten chocolate mug cake gets it right. Here’s why:
- Time Saver: It’s ready in 5 minutes, from mixing to eating.
- Minimal Cleanup: One mug, one spoon, and a microwave. That’s it.
- Portion Control: Perfect for a single serving of chocolate indulgence.
- Rich & Gooey: The chocolate center melts perfectly, giving you that luxurious molten middle without needing a fancy oven.
Molten Chocolate Mug Cake Recipe
Let’s be honest: the molten chocolate mug cake has become a lifesaver in my kitchen. Whether it’s satisfying a late-night chocolate craving or surprising guests with a quick dessert, it works every time.
After countless tries (and some fails!), I’ve discovered how small tweaks can take your mug cake from average to extraordinary. Today, I’ll share my tried-and-true recipe and let you in on the secrets I’ve picked up along the way.
Step 1: Choosing the Right Mug

This might sound insignificant, but the right mug can make or break your sweet treat. After multiple attempts, I’ve realized that the ideal mug should:
- Be microwave-safe (most ceramic mugs work, but avoid metal-rimmed ones).
- Have at least a 12-ounce capacity to avoid overflow.
- Preferably, have a thick handle to avoid burns when removing it from the microwave.
Personal Tip
Make sure the mug is broad rather than tall. A taller mug can lead to uneven cooking, with a molten center and dry edges. Wide mugs allow for better heat distribution.
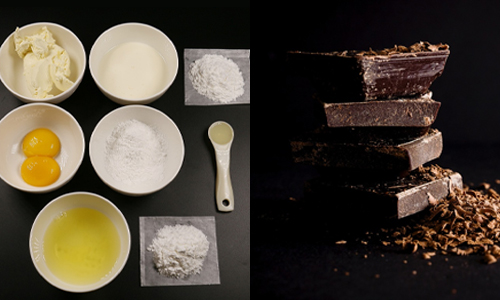
Step 2: The Ingredients (Choose Them Carefully)
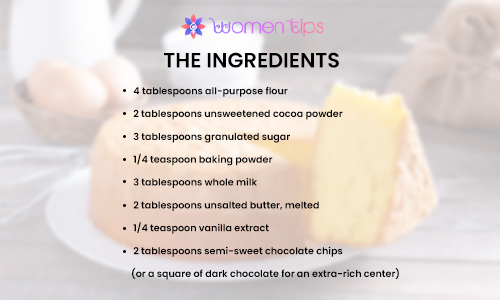
Each ingredient plays an important role, and using the right ones ensures the perfect balance of flavor and texture. Here’s what I’ve learned about each:
- Flour
I’ve tried various flours (whole wheat, almond flour, etc.), but regular all-purpose flour gives the best, fluffiest texture. Anything heavier can make the mug cake dense.
- Cocoa Powder
If you want to control the sweetness yourself, go for unsweetened cocoa powder. Dutch-processed cocoa works well if you want a more intense chocolate flavor.
- Sugar
Granulated sugar is a must. Brown sugar can be used for a deeper flavor, but it affects the texture, making it a little too sticky for my liking.
- Baking Powder
A tiny amount (1/4 teaspoon) makes all the difference. Too much, and the cake will rise too quickly and collapse.
- Milk & Butter
These two ingredients bring moisture to the cake. I’ve tried using oil instead of butter, but melted butter brings a richer flavor and makes the cake taste indulgent. Whole milk works best, but I’ve experimented with almond milk, and it’s a decent substitute for dairy-free versions.
- Vanilla Extract
It’s a small addition, but it enhances the overall flavor. Even though we’re talking about chocolate, a hint of vanilla rounds it out.
- Chocolate Chips
Here’s where the molten magic happens! Place semi-sweet chocolate chips (or a dark chocolate square) right in the center of the batter. When you dig your spoon in, you’ll hit that gooey, molten core.
Step 3: Mixing Matters
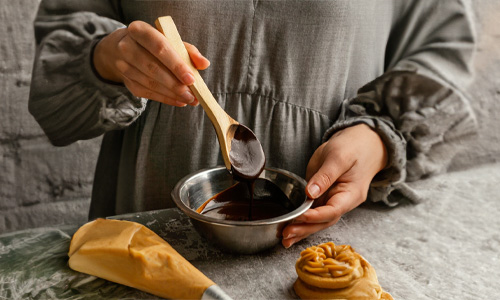
Now, here’s where things can get tricky. The mixing process may seem simple, but over-mixing will make the cake rubbery, while under-mixing will lead to uneven texture.
Personal Tip
Mix all the dry ingredients first: flour, cocoa powder, sugar, and baking powder. Then, slowly stir the wet ingredients—milk, butter, and vanilla extract. I’ve found that using a fork instead of a spoon helps break up any lumps and gives a smoother batter.
Pro Tip
Once the batter is mixed, I add the chocolate chips to the center. I’ve tried adding them before mixing, but they melt too quickly. By placing them in after mixing, the molten center stays perfectly gooey.
Step 4: Microwave Time

This is the most crucial part of the process. Because microwave wattage varies, you may need to adjust the time based on your microwave’s power.
- For a 1000-watt microwave: Cook for 1 minute 15 seconds.
- For an 800-watt microwave: Cook for 1 minute 30 seconds.
Personal Tip
Start with 1 minute and check the cake. The center should be slightly undercooked for that molten, gooey texture. If you overcook it, the cake will be dry and lose that luscious molten middle.
Pro Tip
The cake will continue to cook slightly after it’s out of the microwave, so resist the urge to cook it for an extra 10-15 seconds!
Step 5: Let It Cool (Just a Little)

I know it’s tempting to dive in as soon as the microwave dings, but the molten chocolate needs a minute to settle. I’ve made the mistake of burning my tongue one too many times.
Personal Tip
Let the cake sit for 1 minute before eating. It gives the molten center just enough time to thicken up slightly without hardening.
Step 6: Serving Suggestions & Variations
Once you’ve mastered the basic molten chocolate mug cake recipe, you can have fun with variations. This is where the creativity comes in, and trust me, after making this cake so many times, you’ll want to try these delicious twists!
My Personal Favorite
Peanut Butter Center
- Add a tablespoon of peanut butter alongside the chocolate chips for a rich chocolate-peanut butter surprise.
Salted Caramel
After cooking, drizzle some salted caramel on top. The combination of sweet and salty is divine.
Ice Cream Pairing
Top the mug cake with vanilla ice cream for that classic hot-and-cold dessert experience.
Alternative Molten Chocolate Mug Cake Recipes
I’ve experimented with several variations if you have different dietary needs or want healthier options. After tweaking the classic recipe over time, some alternatives still give you that gooey, indulgent chocolate experience!
1. Dairy-Free Molten Chocolate Mug Cake
This version swaps out butter and milk for coconut oil and almond milk, making it perfect for lactose-intolerant people or those who prefer plant-based desserts. Trust me, you won’t miss the dairy!
- 4 tablespoons all-purpose flour
- 2 tablespoons unsweetened cocoa powder
- 3 tablespoons sugar
- 1/4 teaspoon baking powder
- 1 tablespoon coconut oil
- 3 tablespoons almond milk
- 1/4 teaspoon vanilla extract
- 2 tablespoons dairy-free chocolate chips
Follow the same instructions as the classic recipe, but enjoy knowing it’s dairy-free.
2. Gluten-Free Molten Chocolate Mug Cake
For my gluten-sensitive friends, I’ve tested this recipe using a gluten-free flour mix, and the results are just as delicious. No one will even know it’s gluten-free!
- 4 tablespoons gluten-free all-purpose flour
- 2 tablespoons unsweetened cocoa powder
- 3 tablespoons sugar
- 1/4 teaspoon baking powder
- 3 tablespoons milk
- 2 tablespoons melted butter
- 1/4 teaspoon vanilla extract
- 2 tablespoons gluten-free chocolate chips
3. Low-Sugar Molten Chocolate Mug Cake
Want to cut down on sugar but still indulge? This recipe uses monk fruit sweetener and almond flour for a healthier, lower-sugar option. It’s been my go-to when I want to reduce my sugar intake without sacrificing flavor!
- 4 tablespoons almond flour
- 2 tablespoons unsweetened cocoa powder
- 1 tablespoon monk fruit sweetener
- 1/4 teaspoon baking powder
- 3 tablespoons almond milk
- 1 tablespoon melted coconut oil
- 1 tablespoon sugar-free dark chocolate chips
4. Protein-Packed Molten Chocolate Mug Cake
I love this one for a post-workout treat! With chocolate protein powder and Greek yogurt, it’s a little extra indulgent but packs in a protein punch.
- 3 tablespoons all-purpose flour
- 1 tablespoon chocolate protein powder
- 1 tablespoon unsweetened cocoa powder
- 1/4 teaspoon baking powder
- 2 tablespoons milk
- 1 tablespoon melted coconut oil
- 1 tablespoon Greek yogurt
- 2 tablespoons dark chocolate chips
5. Keto-Friendly Molten Chocolate Mug Cake
For anyone on a ketogenic diet, this keto-friendly version uses almond flour, erythritol, and sugar-free chocolate chips. You can indulge without guilt!
- 4 tablespoons almond flour
- 1 tablespoon unsweetened cocoa powder
- 1 tablespoon erythritol
- 1/4 teaspoon baking powder
- 1 tablespoon butter, melted
- 3 tablespoons almond milk or heavy cream
- 1/4 teaspoon vanilla extract
- 1 tablespoon sugar-free dark chocolate chips
Common Mistakes & Troubleshooting
Even though this molten chocolate mug cake recipe is simple, there are a few common pitfalls that can occur if you’re not careful. After making this dessert dozens of times (and making plenty of mistakes along the way!), I’ve figured out the most common issues and how to solve them. Let’s make sure you avoid these, so you get that perfect, gooey center every time!
1. Cake is Too Dry
Problem: If your mug cake comes out dry and crumbly instead of moist and gooey, it’s most likely because it’s overcooked. Microwave ovens are tricky—they cook food fast but sometimes unevenly.
Fix: Start by microwaving your cake for less time than you think it needs. Most recipes suggest 1 minute to 1 minute 20 seconds, but microwave power varies. I suggest starting at 50-60 seconds and then checking. If it’s still undercooked, you can always add 10-second intervals. Also, make sure you’re using full-fat ingredients like whole milk or butter to keep the cake moist.
2. Cake Doesn’t Rise
Problem: The cake is dense and flat, without the expected nice rise. This usually happens when there’s not enough leavening agent (baking powder), or it’s expired and lost its potency.
Fix: Check your baking powder’s expiration date! If it’s expired, it won’t create the air bubbles needed for the cake to rise. Also, ensure you’re using the right amount—typically 1/4 teaspoon for a mug cake.
3. Gooey Center is Missing
Problem: One of the best parts of this dessert is the molten, gooey center. But if your mug cake is missing that gooey middle, it’s likely because you either didn’t add enough chocolate to the center, or you overcooked the cake.
Fix: For that perfect molten core, make sure to add chocolate chips or a square of dark chocolate right in the middle of the batter before microwaving. It melts into the cake, creating that lava-like center. Also, remember that the cake continues to cook for a few seconds after being removed from the microwave, so aim to undercook it to preserve the gooey texture slightly.
4. Cake Overflowed in the Microwave
Problem: If your cake overflowed and made a mess in the microwave, chances are your mug wasn’t large enough for the batter to expand as it cooked.
Fix: Make sure to use a mug that’s at least 12 ounces. The batter needs room to rise as it cooks, so a too-small mug will result in overflow. A wider mug is ideal for even cooking, while a taller mug can lead to a volcano effect.
5. Uneven Cooking
Problem: The edges of the cake are done, but the center is still raw. This happens when your microwave doesn’t distribute heat evenly, which is a common issue with microwaves.
Fix: Stir the batter thoroughly before microwaving to ensure everything cooks evenly. If you find this is a persistent issue, try cooking the cake in shorter bursts (like 30-second intervals) and allowing it to rest in between to let the heat distribute more evenly throughout the cake.
These are the most common issues and simple fixes. If you have mastered it, I’m sure this will be the best 5 minutes you’ll spend in the kitchen.
How to Make a Mug Cake Without a Microwave
Not everyone has a microwave, but that doesn’t mean you can’t enjoy it! With a little tweak in the method, you can still achieve that rich, gooey center using your stovetop. You may also check how to bake without a microwave.
Stovetop Method (Using a Double Boiler)
If you don’t have an oven or a microwave, you can use a double boiler to steam the mug cake gently.
- Mix the batter following the usual recipe.
- Set up the double boiler by filling a large saucepan with an inch or two of water and simmer over medium heat. Place your mug (heat-safe) into the pan, ensuring it doesn’t touch the water directly.
- Cover the pan with a lid. The steam will cook the cake evenly, taking around 10-12 minutes. Check after 10 minutes to see if the edges are set and the center is still soft.
- Remove the mug from the heat and let it cool for a minute before enjoying your stovetop molten cake.
Ready to give it a try?
This molten chocolate mug cake has become my go-to for instant dessert gratification, and I promise it’ll be yours too. After countless trials and taste tests, this method is foolproof and will impress anyone who tries it. The best part? You can whip it up in just 5 minutes.
For more quick and delicious recipes, don’t forget to sign up for our newsletter! You’ll get exclusive dessert tips, easy recipes, and kitchen hacks in your inbox.
Stephenie
Related posts
Women Tips
Privacy Overview
| Cookie | Duration | Description |
|---|---|---|
| cookielawinfo-checkbox-analytics | 11 months | This cookie is set by GDPR Cookie Consent plugin. The cookie is used to store the user consent for the cookies in the category "Analytics". |
| cookielawinfo-checkbox-functional | 11 months | The cookie is set by GDPR cookie consent to record the user consent for the cookies in the category "Functional". |
| cookielawinfo-checkbox-necessary | 11 months | This cookie is set by GDPR Cookie Consent plugin. The cookies is used to store the user consent for the cookies in the category "Necessary". |
| cookielawinfo-checkbox-others | 11 months | This cookie is set by GDPR Cookie Consent plugin. The cookie is used to store the user consent for the cookies in the category "Other. |
| cookielawinfo-checkbox-performance | 11 months | This cookie is set by GDPR Cookie Consent plugin. The cookie is used to store the user consent for the cookies in the category "Performance". |
| viewed_cookie_policy | 11 months | The cookie is set by the GDPR Cookie Consent plugin and is used to store whether or not user has consented to the use of cookies. It does not store any personal data. |