Ironing is one task that seems simple until you’re face-to-face with a wrinkled shirt that somehow looks worse after you’ve ironed it. But trust me, knowing how to iron clothes can make a difference in your day-to-day life. It can be the difference between looking sharp and showing up to work in what looks like a crumpled paper bag.
You’re in the right place if you’ve ever struggled to figure out how to iron a shirt without scorching it or spent half an hour wrestling with a stubborn wrinkle. We’re here to help you master the work ironing board. After all, it’s already intimidating enough without taking it too seriously.
In this detailed guide, we’ll cover everything you need to know, from choosing the right tools to avoiding common mistakes. Plus, we’ll sprinkle in some fun stories (because who hasn’t made at least one ironing disaster?), so grab your iron and let’s get started!
Picking the Right Gear for Ironing
Before pressing those clothes, you must ensure your equipment is up to the task. You wouldn’t try to cook a gourmet meal with a broken stove, right? The same goes for ironing. You’re setting yourself up for failure if you don’t have a suitable iron, board, or accessories.
How to Choose the Right Iron?
Not all irons are created equal. You don’t need to splurge on the fanciest model, but having one with the right features can make a huge difference. Here’s what to look for when choosing the best iron for your needs:
1. Adjustable Temperature Settings
Fabrics have different heat tolerances. You need to be able to adjust your iron to avoid burning delicate materials like silk while applying enough heat to stubborn fabrics like linen.
2. Steam Function
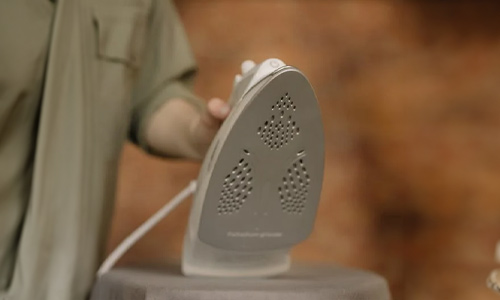
Steam is the secret weapon in any ironing routine. Look for an iron with a powerful steam burst function to help loosen up wrinkles and make ironing smoother.
3. Weight
This one’s a bit personal. Some people prefer lighter irons for easy maneuvering, while others like a heavier iron to press down on tough wrinkles. I find a heavier iron works better for me. Once, I had a super-light iron that felt like a toy. It took so much effort to press down on my cotton shirts that I had sore arms and still-wrinkled clothes. Never again!
4. Corded vs. Cordless
Traditional corded irons are the most common, but cordless models are becoming popular, too. If you often iron in tight spaces or hate getting tangled in the cord, a cordless iron might be your new best friend.
Bonus Tip
If you’re serious about learning how to iron clothes like a pro, consider an iron with a vertical steam function. This feature is fantastic for steaming clothes while they hang—perfect for when you’re in a rush!
Finding the Right Ironing Board
Your ironing board matters just as much as your iron. The best boards are sturdy and offer plenty of space for larger items. Here’s what to keep in mind:
1. Size
A wider board means less shifting and repositioning when ironing larger items like pants and dresses. Standard boards are fine for most tasks, but if you often iron larger garments, a wider board will save you time and frustration.
2. Height Adjustability
Make sure your ironing board is height-adjustable to avoid straining your back. There’s nothing worse than spending 20 minutes ironing only to realize your back is in knots because the board was too low.
3. Padding
A well-padded board cover can be the difference between smooth clothes and imprinting the board’s grid pattern onto your shirt. Extra padding also helps absorb the heat, making the ironing process more efficient.
Once, I tried ironing on a table covered with a towel because I couldn’t find my ironing board. It didn’t work. The table was too hard, the towel slipped, and my shirt looked even worse than when I started. Lesson learned—use a proper ironing board.
Accessories You Didn’t Know You Needed
While an iron and board are the essentials, a few accessories can make your life much easier when learning how to iron clothes.
1. Spray Bottle

Keeping a spray bottle handy allows you to mist stubborn wrinkles. Slightly damp clothes are easier to iron because the heat from the iron and the moisture from the water work together to smooth out creases.
2. Ironing Cloth
An ironing cloth is a lifesaver for delicate fabrics. It’s just a thin cotton cloth between the iron and your garment to protect the fabric from direct heat.
3. Lint Roller
Always keep a lint roller around to remove lint, pet hair, and dust from your clothes before ironing. There’s nothing worse than finishing a perfect iron job only to find stray hairs all over your clothes.
4. Starch Spray
If you love that crisp, fresh-from-the-laundry look, a light spray of starch on your shirts and pants can help maintain a sharp crease.
How to Iron Clothes: Step-by-Step Guide
Now that you’re equipped with the right tools let’s dive into the ironing process.
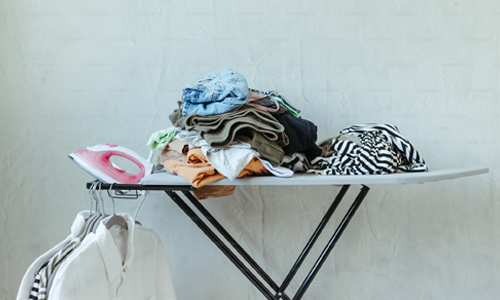
Step 1: Sort Clothes by Fabric Type
Before you even turn on the iron, the first step is sorting your clothes by fabric type. Each fabric requires a different heat setting, so this step is crucial to avoid burning or damaging your garments.
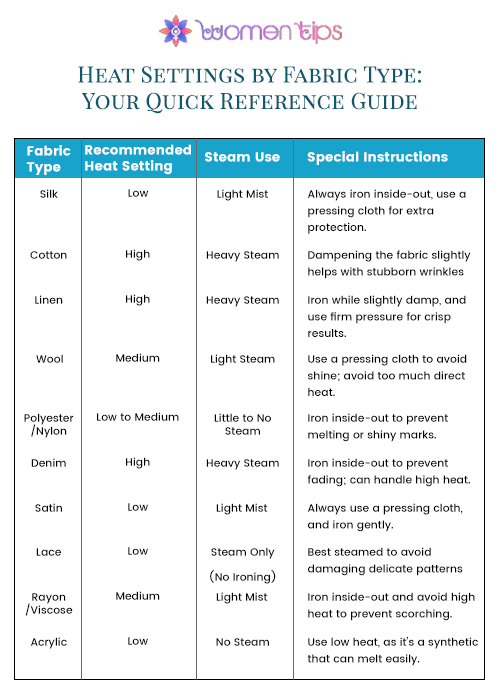
- Low Heat (Delicate Fabrics): Silk, polyester, nylon
- Medium Heat (Regular Fabrics): Wool, satin
- High Heat (Sturdy Fabrics): Cotton, linen
Always check the care label on your clothes to find out what heat setting is best.
Heat Settings by Fabric Type: Your Quick Reference Guide
Step 2: Prep Your Clothes
Make sure your clothes are clean before ironing. Ironing over dirt or stains can make them more permanent. If you’re dealing with particularly wrinkled clothes, lightly mist them with water using your spray bottle. Damp fabric is easier to iron, and the steam from the moisture will help eliminate wrinkles faster.
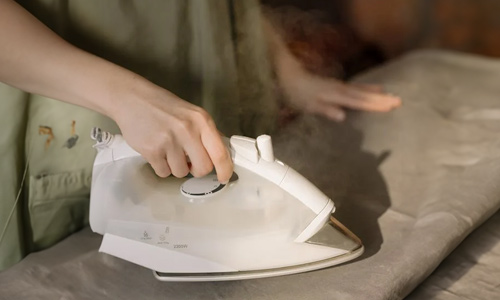
Step 3: Use Steam to Your Advantage
Steam is your best friend when it comes to removing wrinkles. Most modern irons have a steam burst function—don’t be afraid to use it liberally! This feature helps loosen stubborn wrinkles, especially on thicker fabrics like linen and denim.
For particularly tough wrinkles, use the spray function on your iron to dampen the fabric slightly before going over it with the iron. However, be careful not to overdo it—too much steam can leave your clothes damp and prone to wrinkling again once you’re finished.
How to Iron a Shirt?
I used to iron my shirts from bottom to top, thinking it was more efficient. But every time I’d get to the collar, I’d end up wrinkling the front again while trying to smooth out the neck. It took me years to realize the simple hack of starting at the collar!
Let’s discuss how to iron a shirt properly because if you’re going to get one thing right, it should be this: A well-ironed shirt can make a huge difference in how polished and put-together you look.
Step 1: Start with the Collar

Begin by popping the collar up and ironing the back of it. Always iron from the points of the collar inward to avoid stretching it out. Once the back is smooth, flip the collar over and give the front a quick press.
Step 2: Iron the Cuffs
Unbutton the cuffs and lay them flat. Iron from the edges inward to avoid stretching, just like with the collar. Flip the cuffs over and smooth out the inside as well.
Step 3: Move to the Sleeves
Lay the sleeve flat on the ironing board and align the seam. Start from the shoulder and work your way down to the cuff, keeping the fabric flat and smooth. Flip it over and repeat on the other side.
Step 4: The Body of the Shirt
Button the top button and lay one side of the shirt flat on the board. Start ironing from the shoulder down, being careful around buttons (iron around them, never over them!). Repeat this on both sides of the shirt, and finish with the back.
Common Ironing Mistakes (And How to Fix Them)
Even the best of us have made some ironing mistakes. Let’s cover a few common errors and how to avoid them.
Mistake #1: Using the Wrong Heat Setting
One of the biggest mistakes you can make when learning to iron clothes is using too much heat. Always check the care label on your clothes for guidance on the right temperature setting. It’s better to start too low and work your way up than to burn your favorite blouse.
Mistake #2: Skipping the Ironing Cloth for Delicate Fabrics
Direct heat can damage fabrics like silk or satin, so always use a pressing cloth between the iron and the fabric. A simple cotton cloth or pillowcase works perfectly for this purpose.
Mistake #3: Not Emptying the Water Tank
If your iron has a water tank for steam, it’s important to empty it after each use. Stagnant water can lead to mineral buildup, clogging your iron’s steam vents and leaving white residue on your clothes.
Once, I left water sitting in my iron for weeks. The next time I tried to iron, the steam function didn’t work, and I ended up spraying white gunk all over my dress.
Ironing Challenges and How to Overcome Them
It isn’t always straightforward, especially with tricky fabrics or complicated garments. Here’s how to tackle a few common ironing challenges
- Problem #1: Delicate Fabrics (Silk, Satin, Polyester)
Delicate fabrics can be intimidating because they scorch easily. Always use a low heat setting and iron these fabrics inside-out. If you’re nervous, place a pressing cloth over the fabric to protect it from direct heat.
- Problem #2: Stubborn Wrinkles in Linen or Cotton
Linen and cotton are notorious for their stubborn wrinkles but can handle higher heat. Use the steam function on your iron liberally, and if needed, lightly spray the fabric with water before ironing.
- Problem #3: Pleats and Ruffles
Ironing pleats and ruffles can be tricky because flattering the details is easy. For pleats, use the tip of the iron and work from the top down, pressing the crease into place as you go. Steam is your best friend for ruffles—use it to gently smooth out wrinkles without pressing the ruffles flat.
Now that you know how to iron clothes, you’re ready to tackle even the most stubborn wrinkles. Remember, ironing doesn’t have to be a chore—it’s an opportunity to relax, focus, and make your clothes look amazing. So, the next time you’re faced with a pile of wrinkled laundry, don’t stress. You’ve got this!
Stephenie
Related posts
Women Tips
Privacy Overview
| Cookie | Duration | Description |
|---|---|---|
| cookielawinfo-checkbox-analytics | 11 months | This cookie is set by GDPR Cookie Consent plugin. The cookie is used to store the user consent for the cookies in the category "Analytics". |
| cookielawinfo-checkbox-functional | 11 months | The cookie is set by GDPR cookie consent to record the user consent for the cookies in the category "Functional". |
| cookielawinfo-checkbox-necessary | 11 months | This cookie is set by GDPR Cookie Consent plugin. The cookies is used to store the user consent for the cookies in the category "Necessary". |
| cookielawinfo-checkbox-others | 11 months | This cookie is set by GDPR Cookie Consent plugin. The cookie is used to store the user consent for the cookies in the category "Other. |
| cookielawinfo-checkbox-performance | 11 months | This cookie is set by GDPR Cookie Consent plugin. The cookie is used to store the user consent for the cookies in the category "Performance". |
| viewed_cookie_policy | 11 months | The cookie is set by the GDPR Cookie Consent plugin and is used to store whether or not user has consented to the use of cookies. It does not store any personal data. |